> ## Documentation Index
> Fetch the complete documentation index at: https://docs.juncta.xyz/llms.txt
> Use this file to discover all available pages before exploring further.
# How to Provide Liquidity on Juncta
> Learn how to provide liquidity and configure adaptive mode on Juncta.
export const RelatedLinks = ({title = "Related links", links}) => ;
export const urls = (() => {
const base = "https://app.juncta.xyz";
return {
dashboard: base,
provideLiquidity: `${base}/liquidity/provide`,
borrow: `${base}/borrow`,
portfolio: `${base}/portfolio`,
swap: `${base}/swap`,
faucet: `${base}/faucet`
};
})();
## Providing liquidity on Juncta
To provide liquidity on Juncta, you need to select an available liquidity pool or create a new one and deposit the appropriate token pairs of equal value into the pool. Then you can start earning trading fees
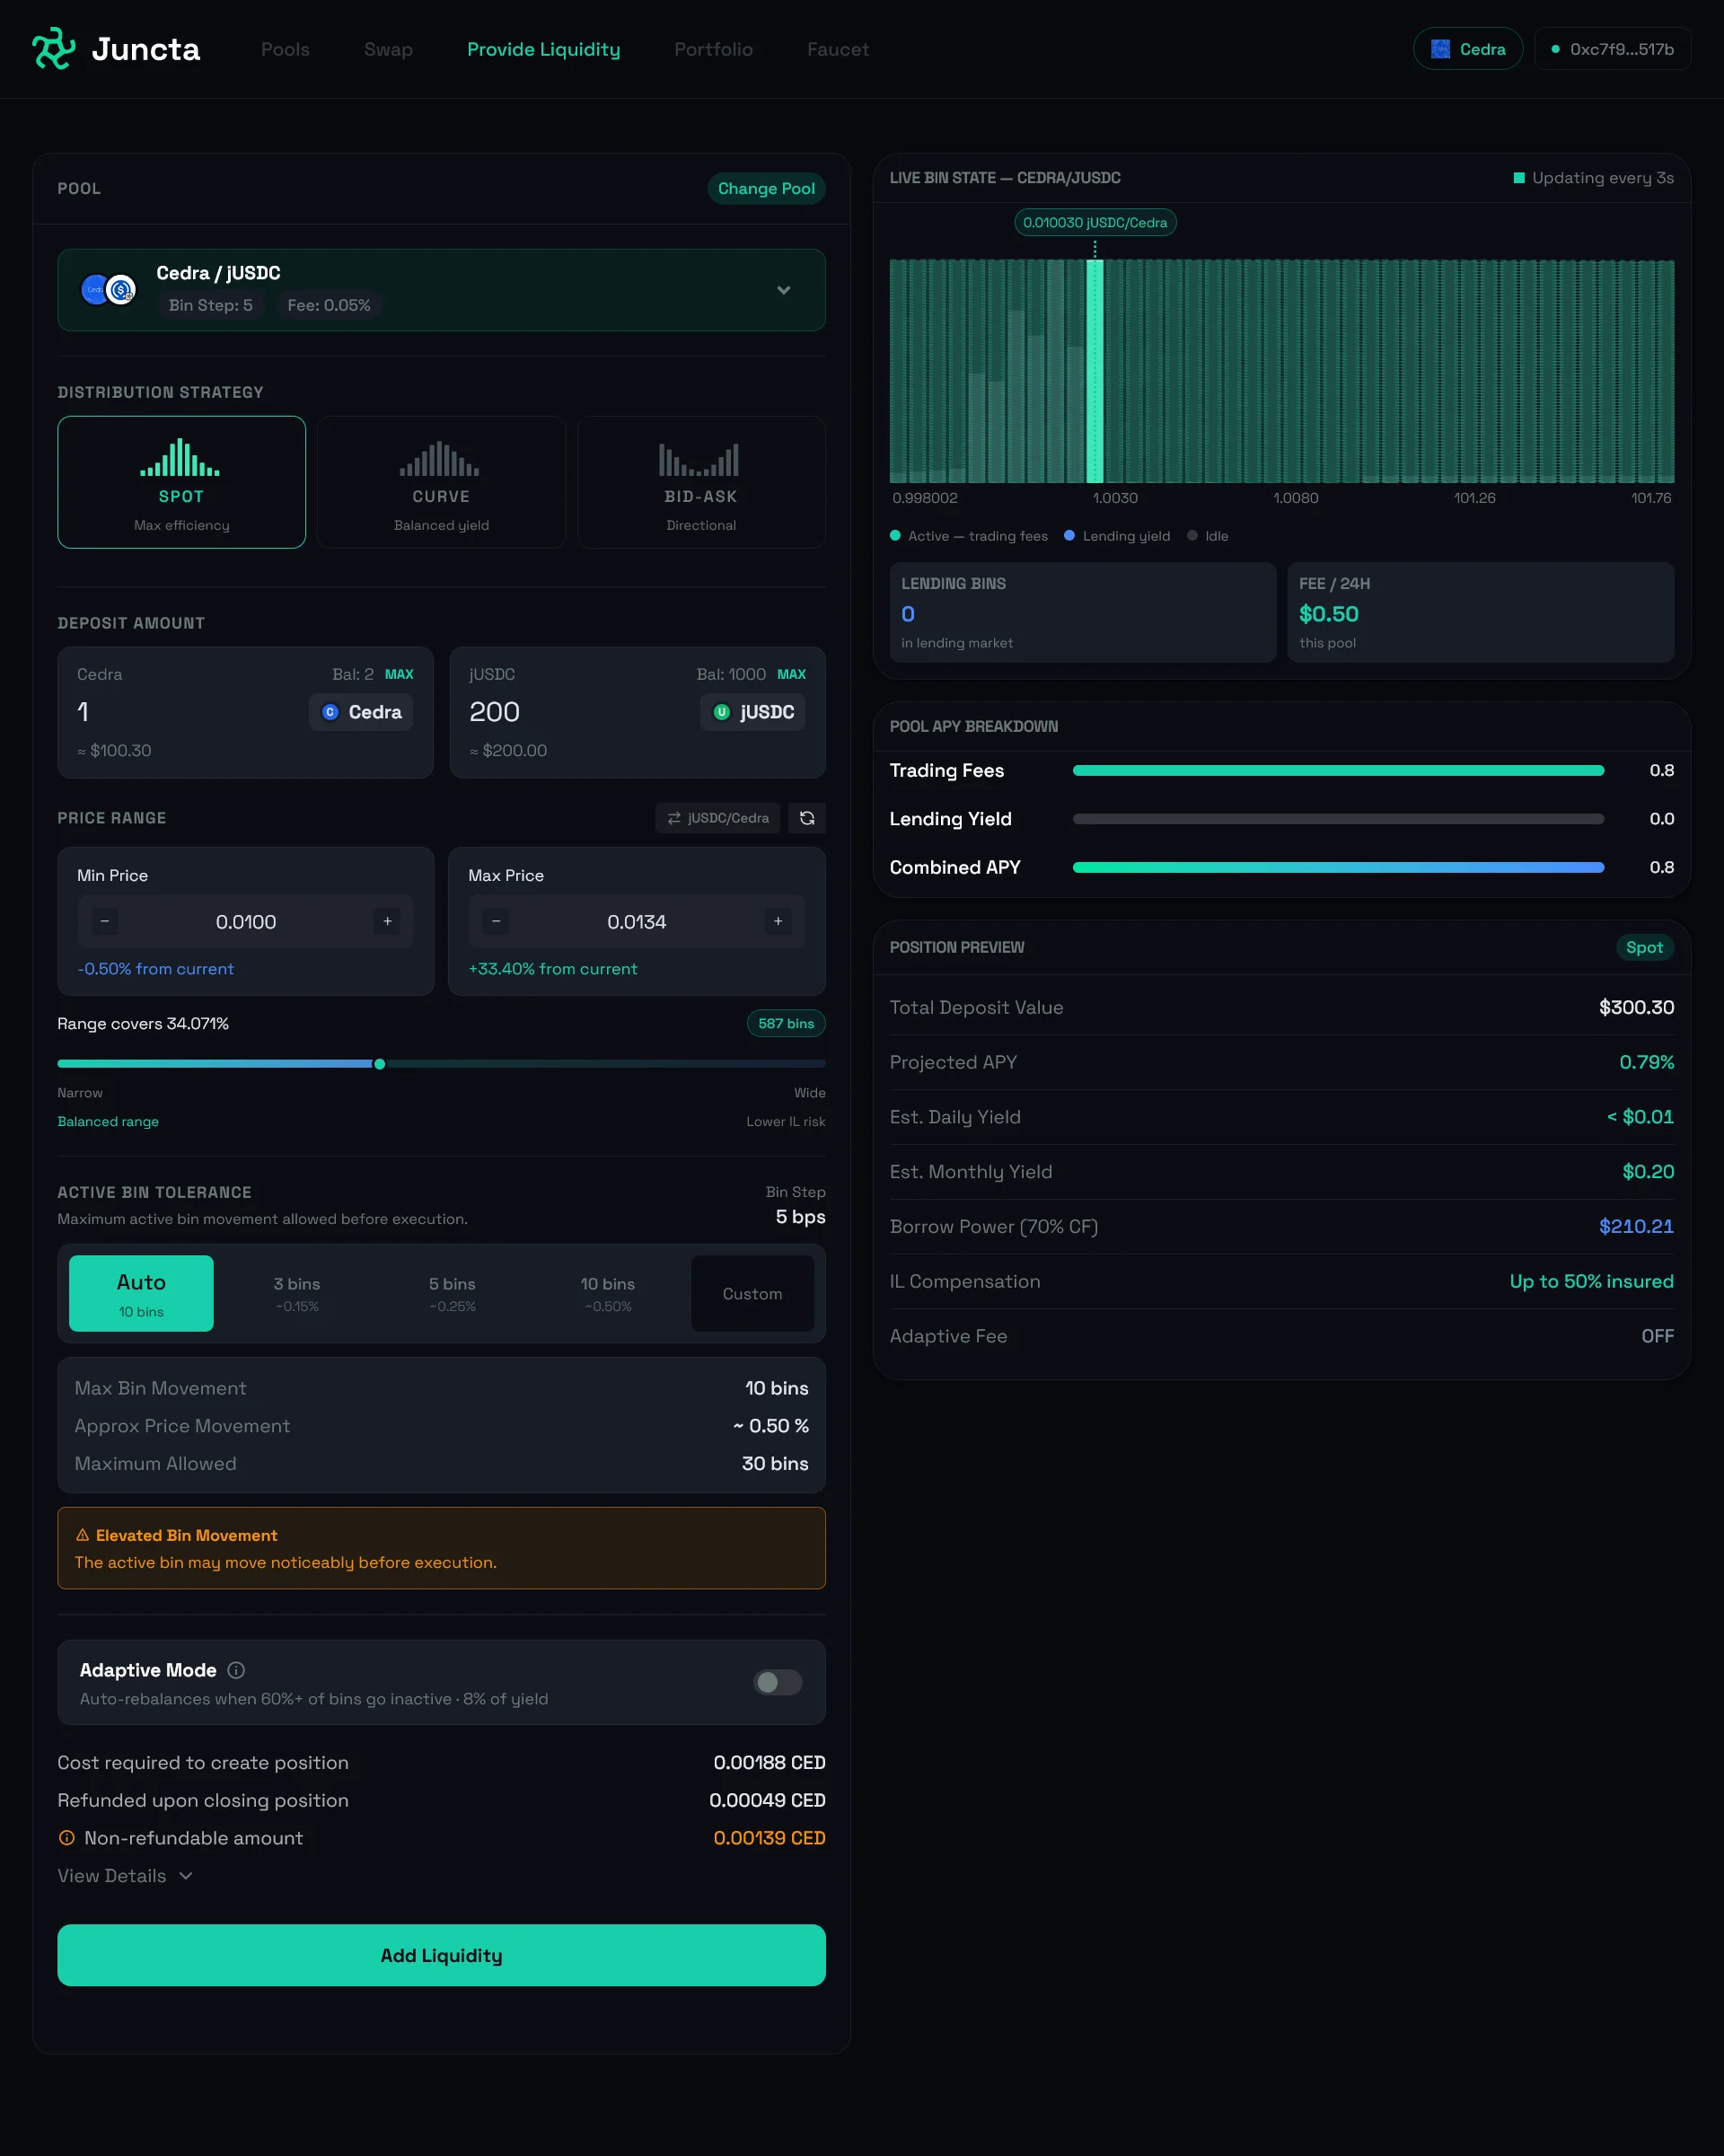 1. Select the **Provide Liquidity** tab on
your dashboard.
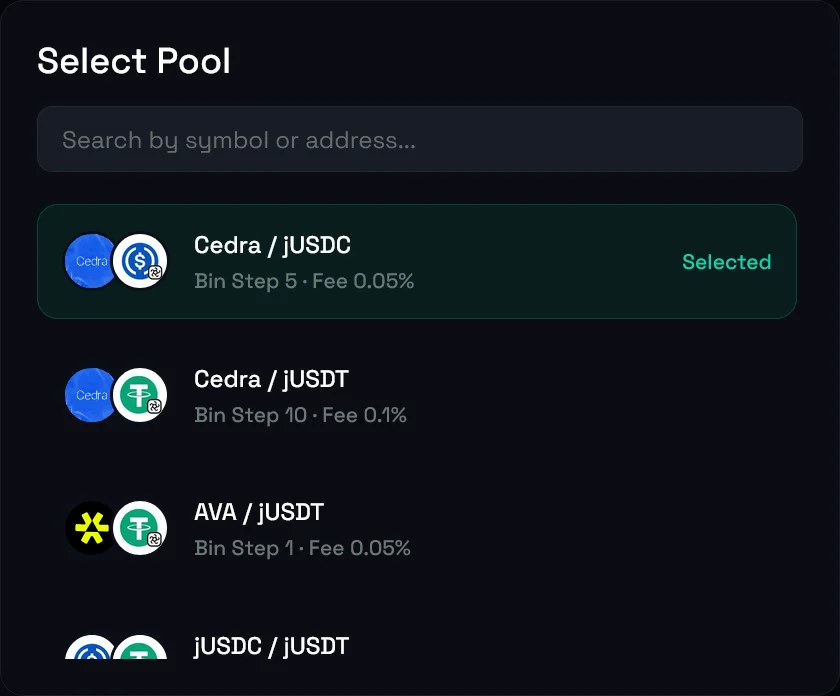
2. Select your preferred liquidity pool.
1. Select the **Provide Liquidity** tab on
your dashboard.
2. Select your preferred liquidity pool.
 You can search for a pool by the symbol or address:
 Alternatively, you can [create a new pool](./how-to-create-a-liquidity-pool)
if you cannot find an existing one that matches your desired token pair and
price range.
3. Select your preferred distribution strategy across the available bins.
Alternatively, you can [create a new pool](./how-to-create-a-liquidity-pool)
if you cannot find an existing one that matches your desired token pair and
price range.
3. Select your preferred distribution strategy across the available bins.
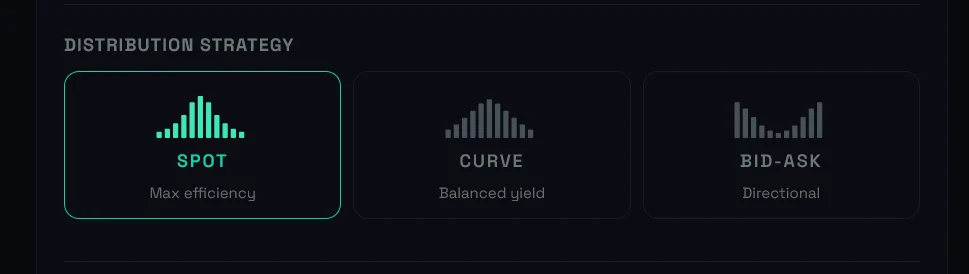 There are three types of distribution strategies to choose from. You can read
more about the different strategies and how to choose one in our [bin
strategy guide](./choosing-a-bin-strategy).
4. Deposit the required token pairs into the pool.
There are three types of distribution strategies to choose from. You can read
more about the different strategies and how to choose one in our [bin
strategy guide](./choosing-a-bin-strategy).
4. Deposit the required token pairs into the pool.
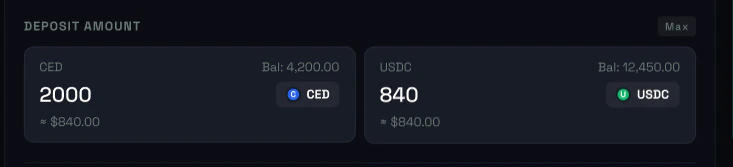 When you input the amount for one token, the dashboard will automatically calculate the required amount of the other token based on the current price and your chosen distribution strategy.
If you try to deposit all your tokens, you won't have enough balance to pay
for transaction fees, which will result in a failed transaction. We
recommend keeping at least 10% of your token balance free to cover for
transaction fees.
5. If you select the **bid-ask** distribution strategy, you will also need to choose how to provide liquidity on either the bid or ask side of the order book.
When you input the amount for one token, the dashboard will automatically calculate the required amount of the other token based on the current price and your chosen distribution strategy.
If you try to deposit all your tokens, you won't have enough balance to pay
for transaction fees, which will result in a failed transaction. We
recommend keeping at least 10% of your token balance free to cover for
transaction fees.
5. If you select the **bid-ask** distribution strategy, you will also need to choose how to provide liquidity on either the bid or ask side of the order book.
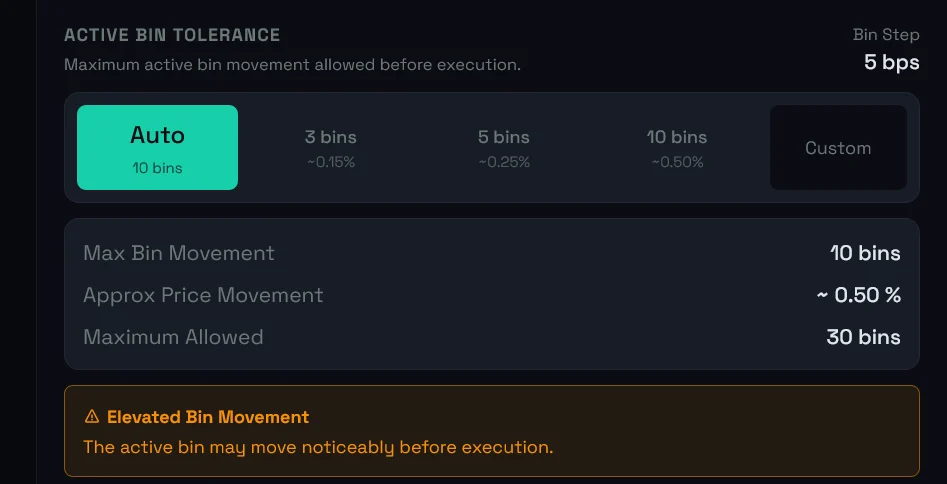
 6. Select an option for the active bin tolerance. Since the active bin might move before your liquidity gets deposited into the pool, this setting will help you hedge against losses that might arise from price movement. If you do not know what to select, choose the **auto** option recommended by the team.
 7. Optionally, you can [enable adaptive mode](#enable-adaptive-mode-to-automatically-rebalance-your-liquidity-position) to automatically rebalance your liquidity position as market conditions change. This allows you to maintain an optimal distribution of your liquidity across the bins and maximize your earnings.
8. Finally, click the **Add Liquidity** button to confirm your deposit and start providing liquidity on Juncta.
## Enable adaptive mode to automatically rebalance your liquidity position
Juncta offers an adaptive mode feature that allows liquidity providers to automatically rebalance their liquidity positions as market conditions change.
When you enable adaptive mode, the system will monitor the price movements of the assets in your liquidity pool and adjust your position accordingly to maintain an optimal distribution of your liquidity across the bins. This can help you maximize your earnings by ensuring that your liquidity is always positioned in the most favorable price ranges.
7. Optionally, you can [enable adaptive mode](#enable-adaptive-mode-to-automatically-rebalance-your-liquidity-position) to automatically rebalance your liquidity position as market conditions change. This allows you to maintain an optimal distribution of your liquidity across the bins and maximize your earnings.
8. Finally, click the **Add Liquidity** button to confirm your deposit and start providing liquidity on Juncta.
## Enable adaptive mode to automatically rebalance your liquidity position
Juncta offers an adaptive mode feature that allows liquidity providers to automatically rebalance their liquidity positions as market conditions change.
When you enable adaptive mode, the system will monitor the price movements of the assets in your liquidity pool and adjust your position accordingly to maintain an optimal distribution of your liquidity across the bins. This can help you maximize your earnings by ensuring that your liquidity is always positioned in the most favorable price ranges.
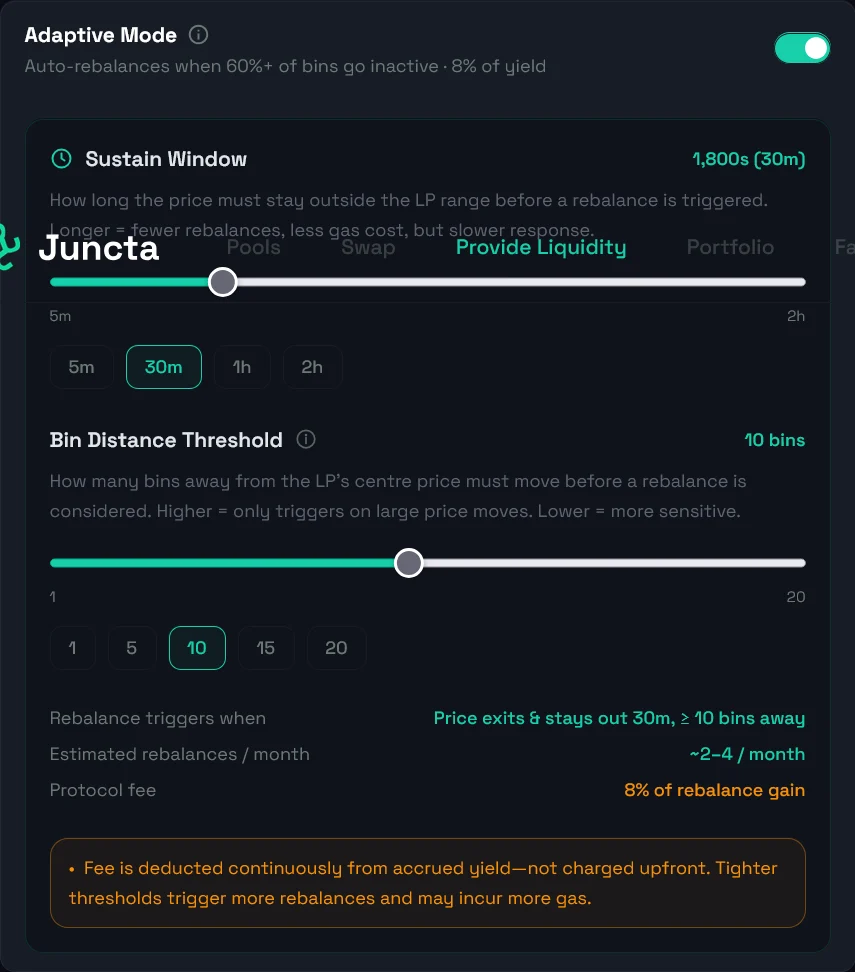 When you enable adaptive mode, you will be charged a fee of 8% of the yield
you earn from that rebalance. This is called the **Adaptive fee** and it is
charged continuously from accured yield and not charged upfront. For example,
if you earn 100USD in yield from a rebalance and the adaptive fee is 8%, you
will be charged 8USD as adaptive fee and receive 92USD.
### Configure adaptive mode settings
By default, adaptive mode will trigger a rebalance when more than 60% of your position's capital is inactive **and** the price centre has moved more than 3 bin-widths from your current distribution centre, sustained for at least 30 minutes.
These are the default values for the sustain window and bin distance, but you can configure custom values to adjust when rebalancing occurs.
To enable adaptive mode, do the following:
1. Toggle the **Adaptive mode** switch when providing liquidity or managing your existing liquidity position.
2. Configure your sustain window. In Juncta, a sustain window refers to how long price must stay outside of your current LP range before your position is rebalanced. A shorter sustain window will result in more frequent rebalancing, while a longer sustain window will result in less frequent rebalancing.
When you enable adaptive mode, you will be charged a fee of 8% of the yield
you earn from that rebalance. This is called the **Adaptive fee** and it is
charged continuously from accured yield and not charged upfront. For example,
if you earn 100USD in yield from a rebalance and the adaptive fee is 8%, you
will be charged 8USD as adaptive fee and receive 92USD.
### Configure adaptive mode settings
By default, adaptive mode will trigger a rebalance when more than 60% of your position's capital is inactive **and** the price centre has moved more than 3 bin-widths from your current distribution centre, sustained for at least 30 minutes.
These are the default values for the sustain window and bin distance, but you can configure custom values to adjust when rebalancing occurs.
To enable adaptive mode, do the following:
1. Toggle the **Adaptive mode** switch when providing liquidity or managing your existing liquidity position.
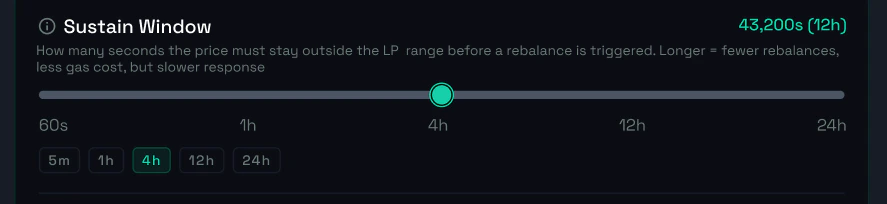
2. Configure your sustain window. In Juncta, a sustain window refers to how long price must stay outside of your current LP range before your position is rebalanced. A shorter sustain window will result in more frequent rebalancing, while a longer sustain window will result in less frequent rebalancing.
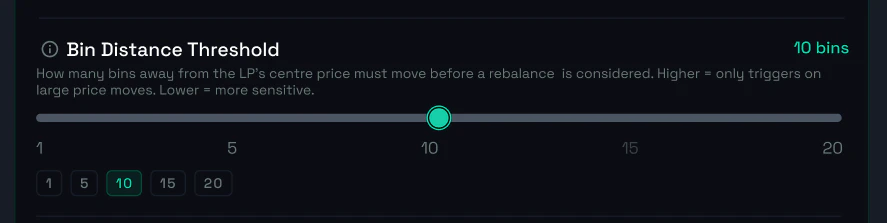
 3. Configure your bin distance. Your bin distance is how many bins away from the LP center, price must move before a rebalance is considered.
 Both your sustain window and bin distance configuration must be met before your position is rebalanced.
For example, if you set a sustain window of 30 minutes and a bin distance of 3 bins, then price must stay outside of your current LP range and be at least 3 bins away from your current position for 30 minutes before your position will be rebalanced.
Both your sustain window and bin distance configuration must be met before your position is rebalanced.
For example, if you set a sustain window of 30 minutes and a bin distance of 3 bins, then price must stay outside of your current LP range and be at least 3 bins away from your current position for 30 minutes before your position will be rebalanced.